Course Tour
Hole 1
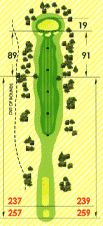
Good opening hole, better hit it straight and don’t be short on the approach.
| Par | 4 |
| Black | 360 |
| Blue | 335 |
| White | 325 |
| Gold | 315 |
| Red | 290 |
| Handicap: 13 | |
Hole 2
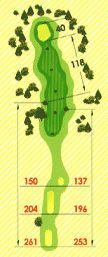
Make sure to drive the ball in the fairway. Trees on left are very much in play. Green can be difficult.
| Par | 4 |
| Black | 394 |
| Blue | 387 |
| White | 352 |
| Gold | 332 |
| Red | 312 |
| Handicap: 11 | |
Hole 3

Accuracy is the key on both the drive and approach shot.
| Par | 4 |
| Black | 401 |
| Blue | 388 |
| White | 373 |
| Gold | 342 |
| Red | 287 |
| Handicap: 5 | |
Hole 4

Good par 3. Length of tee selected gives it character. Avoid hidden pot hole bunker on left.
| Par | 3 |
| Black | 175 |
| Blue | 168 |
| White | 145 |
| Gold | 130 |
| Red | 116 |
| Handicap: 17 | |
Hole 5
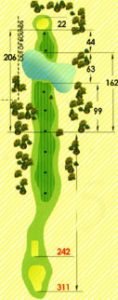
Long tee shot sets up a go for green. Water spans the entire fairway on the approach shot. Good risk/reward hole.
| Par | 5 |
| Black | 526 |
| Blue | 515 |
| White | 494 |
| Gold | 460 |
| Red | 446 |
| Handicap: 1 | |
Hole 6

Must drive the ball in the right center of the fairway and avoid the forest on the left side or be blocked out on approach to green.
| Par | 4 |
| Black | 400 |
| Blue | 385 |
| White | 385 |
| Gold | 352 |
| Red | 347 |
| Handicap: 3 | |
Hole 7
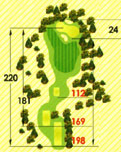
One of the area’s toughest par threes from the back tee with a left hole location. Better hit the part of the green where hole is located due to large size of green.
| Par | 3 |
| Black | 203 |
| Blue | 186 |
| White | 178 |
| Gold | 127 |
| Red | 117 |
| Handicap: 15 | |
Hole 8
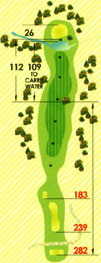
Good par 4. Approach shot distance is critical with water in front of green and trees behind.
| Par | 4 |
| Black | 401 |
| Blue | 354 |
| White | 321 |
| Gold | 312 |
| Red | 291 |
| Handicap: 7 | |
Hole 9
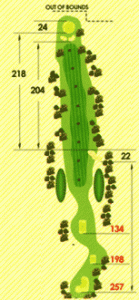
Well bunkered par 5. Avoid the fairway bunker on the right and the two that guard the approach shot.
| Par | 5 |
| Black | 505 |
| Blue | 495 |
| White | 479 |
| Gold | 381 |
| Red | 371 |
| Handicap: 9 | |
Hole 10
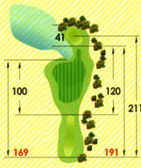
Tough par 3 with water left.
| Par | 3 |
| Black | 202 |
| Blue | 192 |
| White | 184 |
| Gold | 173 |
| Red | 160 |
| Handicap: 10 | |
Hole 11
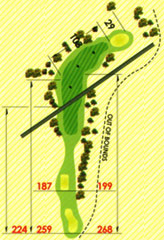
Avoid OB and trees on the right. Good tee shot sets up a short approach.
| Par | 4 |
| Black | 363 |
| Blue | 353 |
| White | 342 |
| Gold | 300 |
| Red | 288 |
| Handicap: 14 | |
Hole 12

Play smart on drive–OB right with bunker and pond in landing zone.
| Par | 4 |
| Black | 340 |
| Blue | 334 |
| White | 327 |
| Gold | 320 |
| Red | 312 |
| Handicap: 4 | |
Hole 13
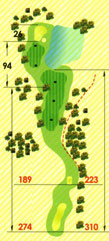
Hit the tee shot to right center of fairway and you will still be left with a difficult second shot to a challenging green. If you drive the ball anywhere else, a punch out is in your future.
| Par | 4 |
| Black | 390 |
| Blue | 380 |
| White | 357 |
| Gold | 302 |
| Red | 296 |
| Handicap: 8 | |
Hole 14
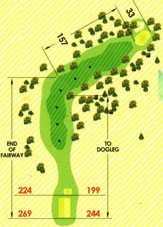
One of the hardest par 4’s in Southern Illinois. Good tee shot will set up a long iron or fairway wood to the green.
| Par | 4/5 |
| Black | 435 |
| Blue | 425 |
| White | 416 |
| Gold | 395 |
| Red | 388 |
| Handicap: 2 | |
Hole 15

Hit the ball out of the chute into the fairway and avoid the OB right. You will then have an approach downhill to a small, well protected green.
| Par | 4 |
| Black | 414 |
| Blue | 404 |
| White | 381 |
| Gold | 315 |
| Red | 308 |
| Handicap: 6 | |
Hole 16
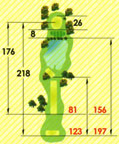
Length of tee selected determines the hole’s difficulty — 100 – 215 yards all carry over water!
| Par | 3 |
| Black | 218 |
| Blue | 173 |
| White | 150 |
| Gold | 125 |
| Red | 102 |
| Handicap: 18 | |
Hole 17
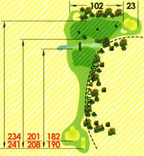
Don’t gamble! Play the hole as designed or you may experience a high number.
| Par | 4 |
| Black | 313 |
| Blue | 305 |
| White | 303 |
| Gold | 292 |
| Red | 285 |
| Handicap: 12 | |
Hole 18
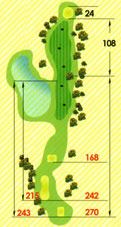
Avoid water left and trees right on drive. Approach to a big green with water on the right side.
| Par | 4 |
| Black | 380 |
| Blue | 357 |
| White | 330 |
| Gold | 291 |
| Red | 281 |
| Handicap: 16 | |
